
Why would I want to do this?
Interacting with Blockchains and blockchain technology probably seems for most people like a very complex task. How to even get started? Don’t they run on some servers spread across the globe? How would I make a transaction and see the result? Wouldn’t I use to use real money to do this?
If you want to play around with using Blockchain technology but don’t know how to get started a great way is to run a local test blockchain on your own computer. It’s easy to set up, carries no risk of losing your own money, gives you immediate insight into what’s happening and can just be reset at any moment so you can try over and over again.
We’ll use two applications to get started:
- Ganache
- MetaMask
From start to finish it should take no longer than 30 minutes ⌛
Ganache – A Personal Blockchain
The absolute easiest way to get started is by using Ganache. Ganache is a personal Ethereum blockchain running on you own computer that’s incrediby easy to install and get running. It’s basically a virtualized blockchain application.
It’s available for Windows, Mac and Linux, just download the installer, double click to install and run. Takes 5 minutes to get started.
MetaMask
Once Ganache is installed you need a way to interact with the blockchain. There are many applications available to do this but the easiest is probably MetaMask. It’s a browser extension that supports Chrome, Brave, Firefox and Opera plus has iOS and Android apps in beta. Follow the directions on the site to install and create an account.
We will use MetaMask to connect to our local blockchain server so we can add accounts and send test transactions between the accounts. These transactions we will then be able to see in Ganache.
To install MetaMask get it from the Chrome Web Store and follow the instructions to create an account.
Connect MetaMask to Ganache
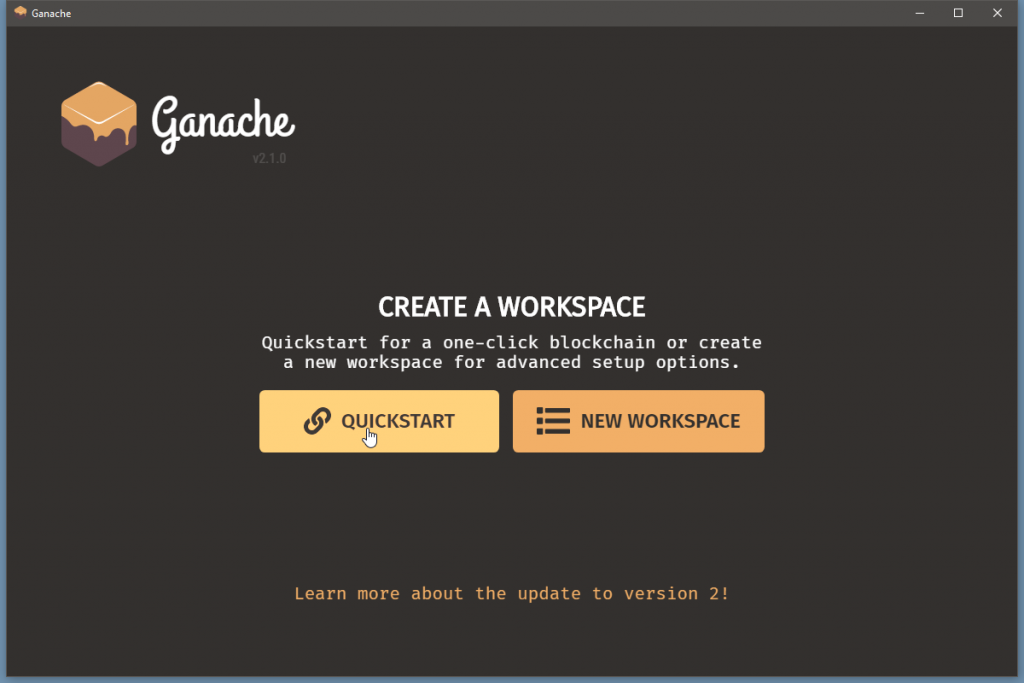
Assuming you have now installed Ganache and MetaMask we need to connect the applications. First run Ganache and select the Quickstart option. This uses the default settings and get us up and running.
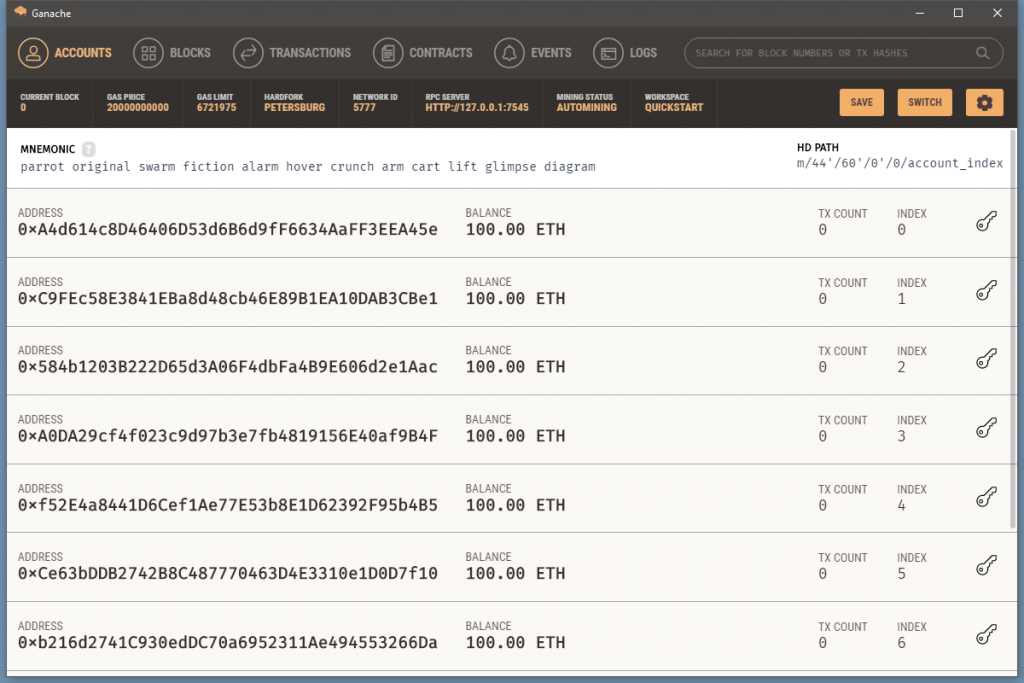
Ganache will now create a test blockchain and some test accounts which by default have 100 ETH (test ETH of course) in each. You can see the accounts below along with their public addresses, balance and transaction counts. That’s all there is to getting the test blockchain 🤜
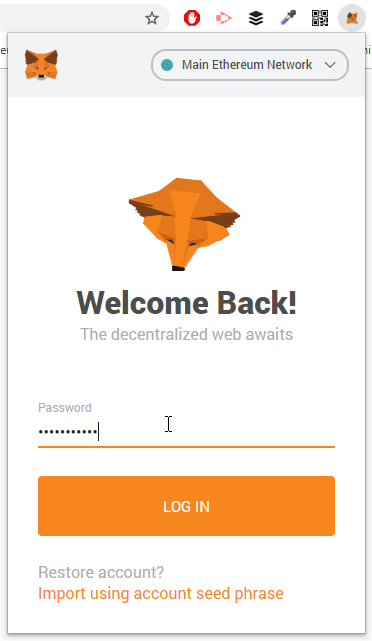
Now that Ganache is running we need to connect it to MetaMask. Open MetaMask and log into your account.
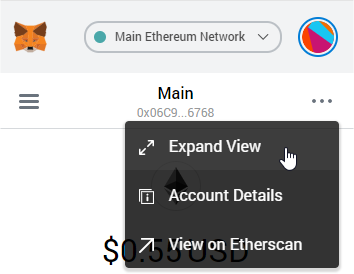
To make working in MetaMask easier you can click on the more menu and choose ‘Expand View‘ to open it full screen.
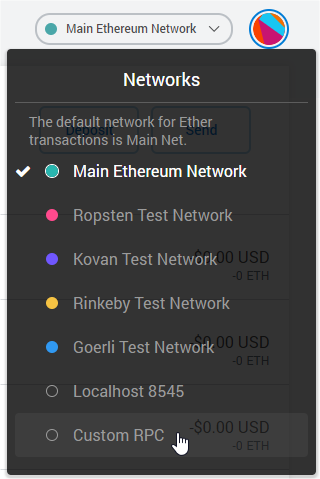
To connect MetaMask to our local blockchain we need to change a few setting in MetaMask. First click on the network name at the top and select ‘Custom RPC‘
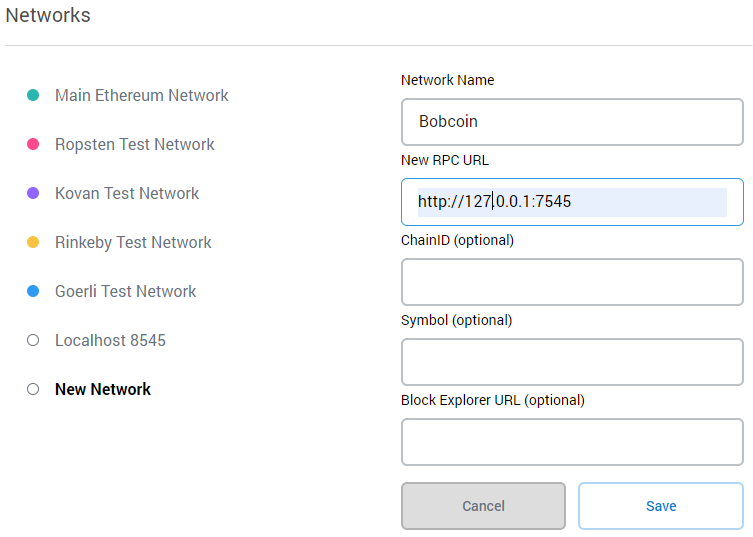
Here we add the details for our local blockchain. If you look in the header of Ganache you can see the server details we will use.

Call the network anything you want, the URL must be http://127.0.0.1:7545 as Ganache is running on port 7545 on localhost and leave the rest blank.
Once you click save you are now connected to the Ganache blockchain, although right now there’s not much to see. To really see what’s going on we need to add accounts to MetaMask.
Adding Accounts
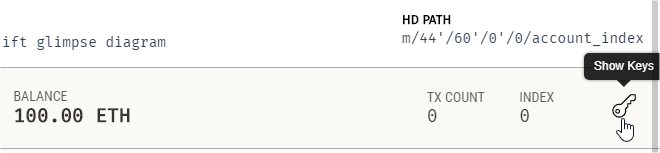
Returning to Ganache choose one of the accounts to add and click on the key symbol. This will allow us to see the private key of the account. Obviously this is not something you would normally be able to do since private keys are, by their nature, private.
Copy the private key address from the next screen.

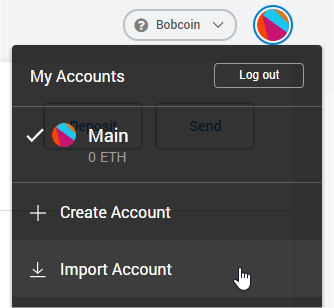
Returning to MetaMask, click on the circle logo and select ‘Import Account‘
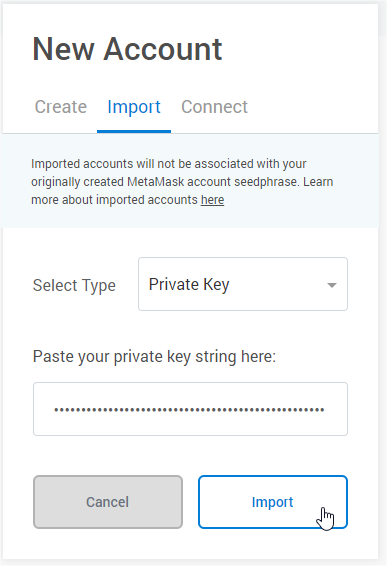
Make sure the type is Private Key and then paste in the private key you copied from Ganache.
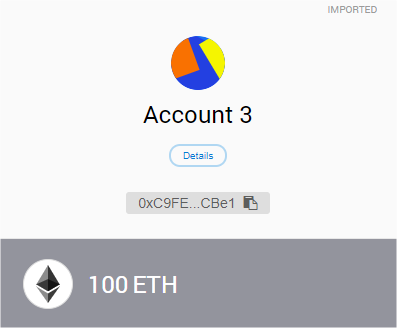
You’ll see the account is imported with a balance of 100 ETH which matches what we saw in Ganache. You can edit your account name by clicking on the name and changing it in the dialog that opens.
Creating Transactions
Now we’re finally ready to start interacting with the blockchain and creating transactions.
First in Ganache choose an account you wish to send ETH to and copy the address.

Back in MetaMask click the Send button as shown here.

In the ‘Add Recipient’ field paste the account address you just copied from Ganache, choose the amount of ETH you wish to send and pick a Transaction Fee. Because this is a test network the fee is irrelevant as the blocks are mined automatically but normally this fee controls how the transaction will be prioritized by miners.
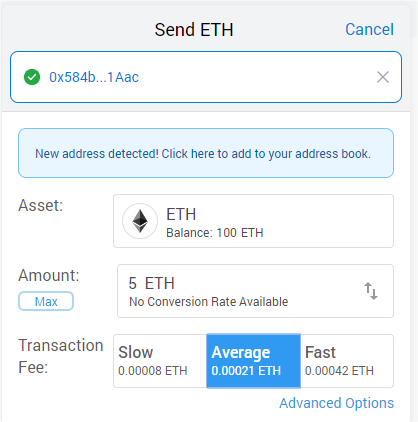
You’ll now see in MetaMask the transaction and remaining balance (100 – 5 – transaction fee)
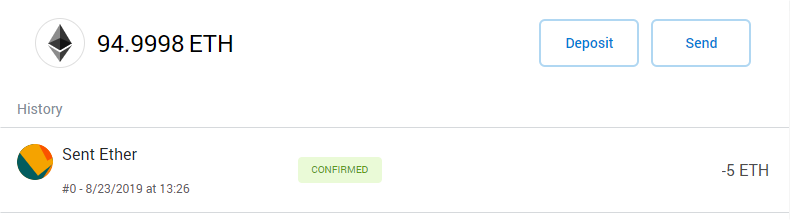
The same can be seen in Ganache, so the sending account is debited with 5 ETH and the receiving account credited with 5 ETH. The transaction fee has been used by the blockchain to create the block containing the transaction.

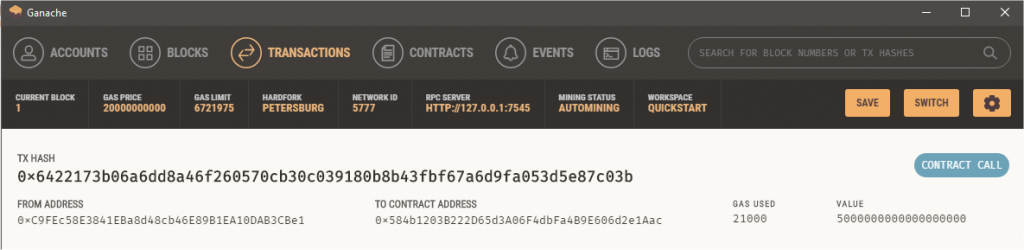
Selecting the transactions tab in Ganache gives you a view of all the transactions made so far.
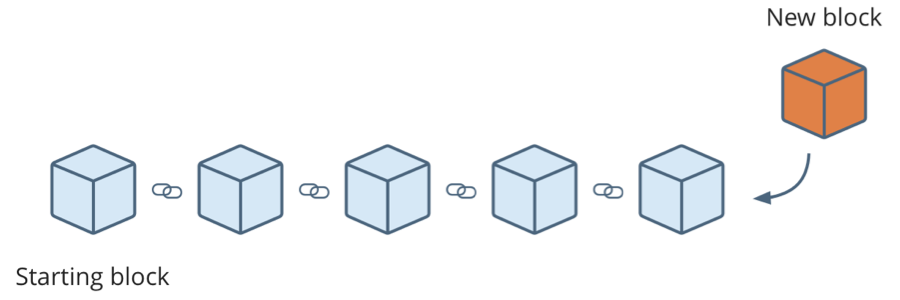
Selecting the Blocks tab in Ganache gives a view of the blocks mined. So far you can see one block was automatically created when we started Ganache. This is known as the Genesis block and forms the head or root of the blockchain. Our transaction created a new block linked to this initial block. Every block created after the initial block is mathematically linked back to the previous block and so on all the way back to Genesis block (block 0).
