

Introduction
I’ve been interested in setting up some home monitoring/automation since getting my first Raspberry Pi a couple of years ago. After using the device for various development projects I finally decided on my first project, try to make a basic home temperature/humidity monitor that cold measure both indoor and outdoors.
The idea is to end with a simple dashboard that can be accessed from a mobile device with the current temperature and maybe a chart with some history. This will require me to both access the live data and to store it for later analysis.
Apart from being a leaning experience and ending with a useful product I also had a few basic requirements for the project.
I didn’t want to run wires around my flat and I wanted an open, non-propitiatory platform that could be extended with other sensors at a later date. I also wanted access to the ‘raw’ data coming from the sensors so I could process and store as I desire.
This means no Apple HomeKit, Samsung Smartthings or Google Home based system, which although probably easy to set up is inherently ‘closed’.
With this goal in mind I selected a Bluetooth Low Energy (BLE) system using beacons and a gateway to collect and forward the data (or advertising data in beacon speak).
The Hardware
Sensors
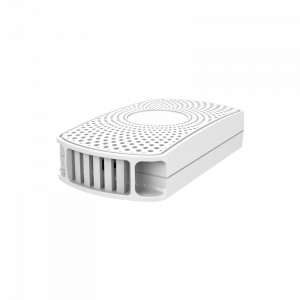
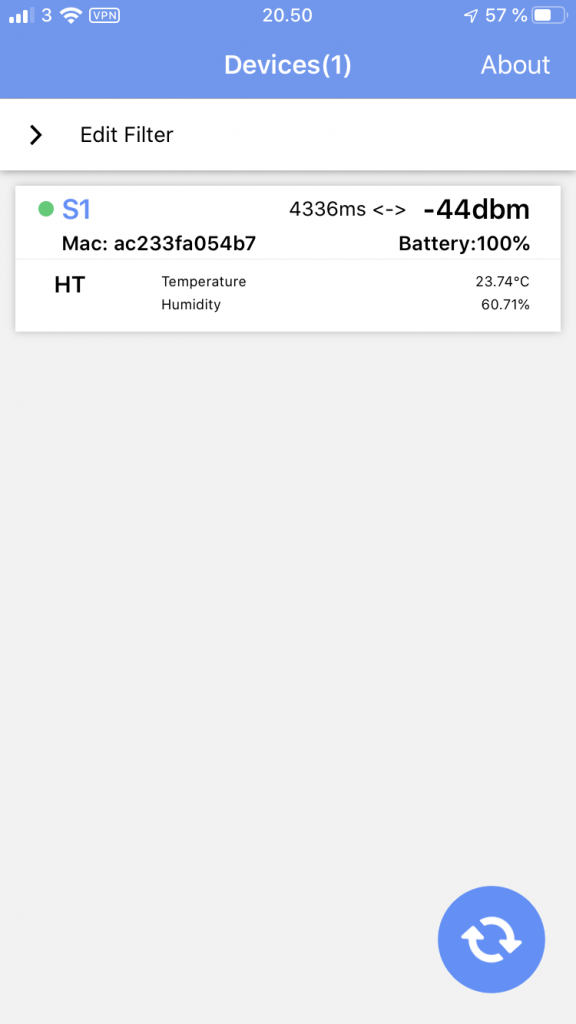
For the sensors I bought two Minew S1 Temperature/Humidity sensors that can be used both indoors and outdoors. These gather data and send the data via Bluetooth at regular intervals that can be determined by you. In my case I collect the data using a Bluetooth Gateway described next but the data could be collected by an app or other device.
The sensor can be configured easily via an app on both Android and iOS.
Bluetooth Gateway
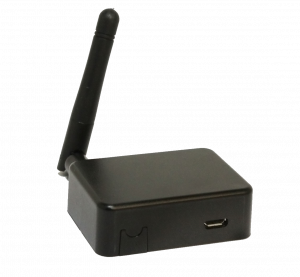
The gateway is an Ingics IGS01S and collects data from Bluetooth devices and forward the payloads (data) via your WiFi. It’s basically a bridge between Bluetooth and WiFi. It can be configured to send the data via multiple methods such as MQTT or HTTP POST (think api).
The device is very small (54mm X 41mm x 18mm) and runs off micro usb using very little power.
Configuration of Hardware
Configuring the S1 Sensor
This is well described many places so I’ll be brief. I should mention that to turn the sensor on is a 3 second press on the button on the base, the same will turn the beacon off. To set the beacon up:
- Install the BeaconSET+ app from the App Store or Google Play
- Follow this guide to disable unused slots (saves power and makes later steps easier)
I set my beacon to send data every 3 seconds as this is adequate for my needs.


Configuring the Gateway
This is also well documented as INGICS have an iGS01S User Guide in pdf format. All configuration is done via the built in web configuration tool and can be done from any device.
To summarize:
- Add antenna and power on (plug in)
- Gateway starts in AP mode allowing WiFi connections
- Connect to AP via WiFi from a device with web browser
- Access the web configuration portal at 192.168.10.1
- Configure with you own WiFi settings
- Configure the gateway application setting (MQTT or HTTP POST)
- Optionally add BLE filters to limit which beacons are forwarded
After configuring and rebooting you can then access the web portal from your own WiFi as it will join your local network and get an IP address from your router. I recommend giving the gateway a fixed IP address by logging into your router and reserving the IP as this will make it easier to locate in future (although it has no effect on functionality).
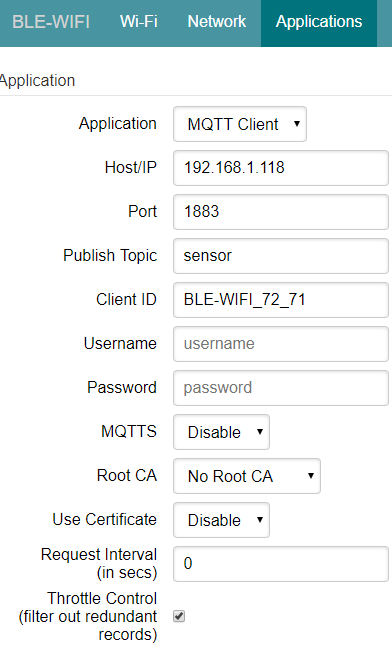
Applications Settings (MQTT or HTTP)
My settings for the Application tab are shown below. I’m using an MQTT client (Node-RED) running on my Raspberry Pi at 192.168.1.118. Port 1883 is the standard MQTT port and I’ve chosen a topic called sensor that I’ll be using later when we set up Nod-RED.
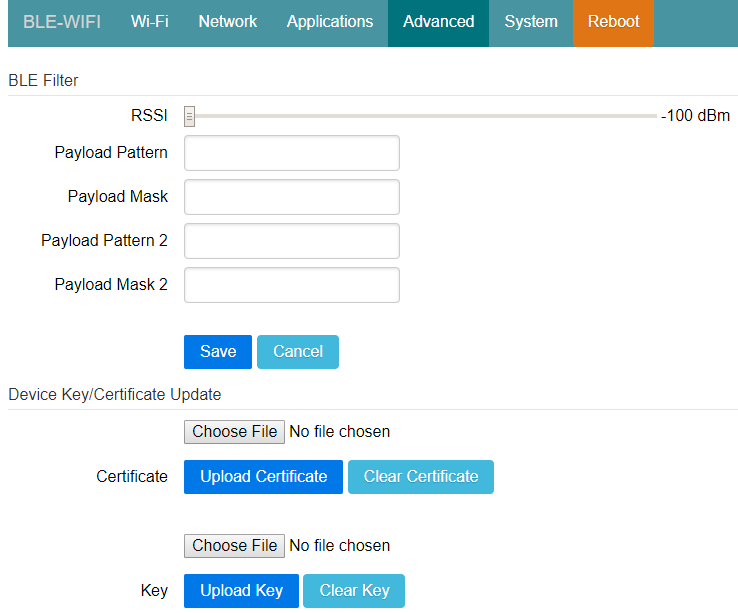
BLE Filters
By default the gateway will collect and forward all Bluetooth data it detects so if you wish to only see your sensors you’ll have to filter out the ‘noise’ in your processing application. Another alternative is to set BLE filters in the gateway, this is documented here, an extract is shown below.
Payload filter is used as filter to keep specified beacons by using payload matching.
Assume your beacon has below report:
$GPRP,0007802DDB1E,C946A6500A33,-43,0201061AFF660200215BC6010015000000F00000000
If your beacons has a fixed field "6602" in above report, you can set
Payload Pattern: 0201061AFF6602
Payload Mask: 0000000000FFFF
Then the gateway will only forward the report when "pattern & mask" matches 6602.
Ex. To match iBeacon:
Payload Pattern: 0201061AFF4C00
Payload Mask: FFFFFFFFFFFFFF
Where you decide to filter doesn’t make that much difference but of course if you filter in your downstream application you’ll be sending a greater volume of data from the gateway. If this isn’t an issue it’s probably easier just to send everything from the gateway.
Another filtering option is to use the RSSI (received signal strength indicator) slider. Moving it further to the right will filter out weaker signals so signals from distant sources will be removed.
The BLE filters are configured in the Advanced tab in the gateway.
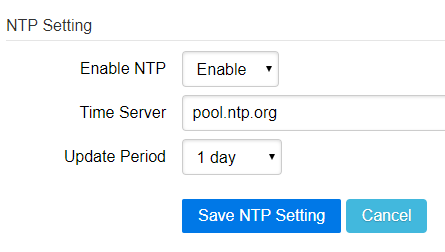
Time Stamping
To enable the gateway to add the timestamp to each message you must enable the NTP server in the System tab. This enables the gateway to look up the current time from an online NTP server at regular intervals.
Once configured the gateway will begin collecting beacon data and forwarding to the MQTT server. We haven’t set up the server yet so the messages will not be received but you won’t see any errors in the gateway.
Next Steps
Now we have the sensor and gateway working in the next part I’ll move to reading the sensor data from the gateway using Node-RED.
Leave a comment